Taking you one step ahead
Using an encrypted hard drive
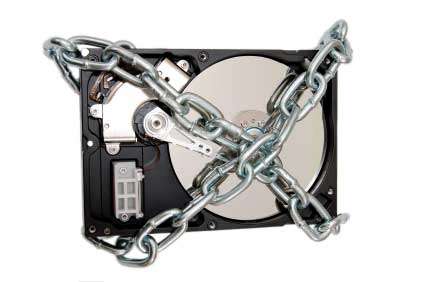
These days security is an important question. Everyone tries to keep stuff as a secret. In this article, I'm focusing on a home solution to keep private things secure. Of course, one may ask: is this really important? This is one point that might worth arguing about. No need to think military grade secrets, but I'm sure there most of us have stuff that should be encrypted. Bank statements, credit card details, passwords, reminders, payslips - or even home videos. As a technical person, I'm not trying to justify the reason behind the encryption, I'd rather look at it as a technical challenge. So let's get to it, shall we?
Ingredients for today's recipie are slim. A working raspberry pi and an external hard drive. Do not forget, that an external 3.5" hard drive will require an external power source - the Pi is not capable of powering it. You may also find that even a 2.5" requires a powered usb hub. You may find that it is working - as soon as the device is under heavy load. Then it may freeze, or show unexpected behaviour. Start with all the external stuff and get it working as reliably as you possibly can.
There are many ways of doing things. Today, I'll focus on LUKS. LUKS stands for Linux Unified Key Setup and is a disk-encryption specification fully supported by the Raspberry Pi. The userspace tools that are required to mount, or otherwise handle encrypted drives are in the cryptsetup and cryptmount packages. The easiest is to instruct your package manager to install these for you. Otherwise, you may visit http://code.google.com/p/cryptsetup/ and start from there. The tasks are quite simple. The userspace tools are provided to configure encryption on a block device - such as your attached hard drive, and it uses the linux kernel device mapper target dm-crypt. What you need to do therefore is to assign (map) your physical drive to a logical name, and then mount that logical name. The encryption is part of the mapping process. So if you have, for example an external disk called /dev/sdb1, you will map it to /dev/mapper/encrypteddisk and then mount /dev/mapper/encrypteddisk instead of /dev/sdb1. Let's see how this is done.
The first step is to reformat your hard drive so it becomes encrypted. This is done with the
cryptsetup --verbose --verify-passphrase luksFormat /dev/sdb1
command. Pick your passphrase and wait - this could take a wile, so be patient. Once the formatting is done, you need to attach it to the filesystem. You will lose your data on your disk, but I guess you kind of expected this. At this point, the external drive doesn't have a valid filesystem, or data. But it's now encrypted. Time to create a filesystem, but for this, you need to let linux know, that we have a new and encrypted device here. Open and map it to the live filesystem using the command
cryptsetup luksOpen /dev/sdb1 segate2t
and wait for the command to complete. Obviously, you need to enter the passphrase which you chose when creating the encryption. This shouldn't take long, and as you can guess, My drive is a Segate external 2TB drive (hence the name segate2t). Of course, you can name your drive whatever you want. After the above command, my encrypted drive is now known to the OS, but still doesn't contain a valid filesystem. To create one, use the following command:
mkfs -t ext3 -V -j -O large_file,sparse_super -m 1 /dev/mapper/segate2t
and wait until the formatting is done. Obviously the process takes a bit longer for larger disks. Pay attention to the mapped name: we're not referring to the physical disk /dev/sdb1 anymore, instead, we're using the mapped name.
Once the formatting is complete, you have a new, shiny and empty encrypted external hard drive - time to mount it. As the encryption is being handled by the kernel, all you need to do is to mount the encrypted drive using the command
mount -t ext3 /dev/mapper/segate2t /content/2t
- note the use of the mapped name again. The directory I'm mounting the external drive to is /content/2t but on your system, it can be whatever you prefer. And this is it! You're done, your new drive is ready to be filled with secure documents, images or videos. To unmount, you need two steps. One is the simple umount command:
umount /content/2t
and then you also need to 'close' the drive, so it can't be seen anymore. This is done with the
cryptsetup luksClose /dev/mapper/segate2t
command. At this point the operating system knows nothing about the encryption and to it the external drive is just a block device with a bunch of zeros and ones.
You may also use device ID instead of the usual /dev/sdb1 (as I was in my above example). To get the device ID, issue the blkid command and look for the right drive. In my example the command provices the UUID as below:
root@rpi_lhr-smith_prod:~# blkid
[...]
/dev/sdb1: UUID="dadee3de-e6e4-496f-92a4-a75d68548e43" TYPE="crypto_LUKS"
[...]
root@rpi_lhr-smith_prod:~#
Some people find it safer to use UUID instead of drive letters, as they may change after a reboot. It's totally up to you. If you decide to use UUID, swap all /dev/sdb references above to
/dev/disk/by-uuid/dadee3de-e6e4-496f-92a4-a75d68548e43
(and subsitute your UUID into it).
Happy encrypting!
- Log in to post comments